Pro Booleans Advantages:
- Better Quality Mesh – fewer small edges and skinny triangles.
- Smaller Polygon Count – minimize vertices and faces.
- Easier and Faster To Use – unlimited number of objects per Boolean operation.
- Cleaner-looking Mesh – co-planar edges remain hidden.
This screen shot is a practice at using the pro boolean tool.The object in the end was to be a peice of cheese.i found the tool easy to use and it creates some interesting shapes.


MAX comes with a wide variety of textures included, but they aren't perfect, and knowing how to fix them and add your own materials and material libraries is vital to successful projects.Materials in MAX are made up of several different maps, each of which can be edited and tweaked to perfect your materials.Bump maps apply texture to a material by using the light and dark values of the bump map image. Dark areas of the image will be rendered as recessed, while light areas will be raised.

Bump Tool
Bump maps apply texture to a material by using the light and dark values of the bump map image. Dark areas of the image will be rendered as recessed, while light areas will be raised.
In order to make my own material I used Photoshop.Making a new file, approx 3cm x 3cm ,Saving as a bitmap.It can then be imported in on material editor.


Materials can be applied by dragging and dropping them to the shape.
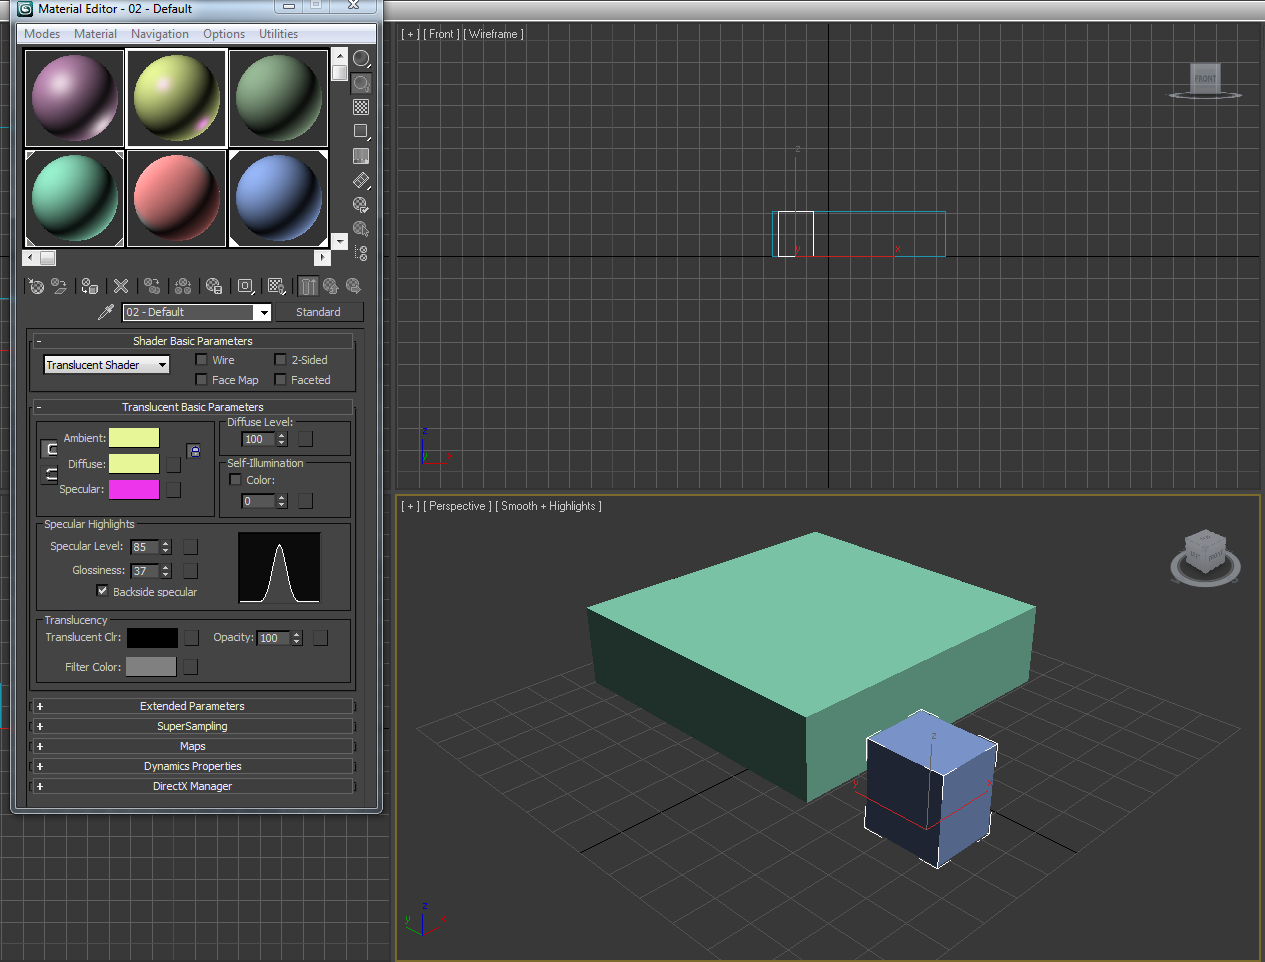
'At the top of the default Material Editor window is a
menu of options including Material, Navigation, Options, and Utilities.
The menu commands found in these menus perform the same functions as
the toolbar buttons, but the menus are often easier to find than the
buttons with which you are unfamiliar. '
'Six sample slots that display a preview
of some available materials come below the menus. Surrounding these
slots are button icons for controlling the appearance of these sample
slots and interacting with materials.'www.expertrating.com

This is a screen shot of experimenting with different colours and shades in material editor.i found this task quite easy,it was interesting to see the types of effects you can create within the software.

High shine,this is created by changing the specular level on material editor.


To create the torus knot it was selected from extended primitives. Opening
the Material
editor. Pick an Anastropic shader as this is ideal for metal
materials. Check on the diffuse button and change the colour to a dark blue.
Make sure that you have a high specular level approx 60 and a high anastrophy
approx 80.
Reflection > None.In the Material library add in your image. This will now add the image to the reflective map channel.you add it to the torus knot you drag and drop.

No comments:
Post a Comment